To Setup a roof
- Create a roof design.
-
Do one of the following:
or
From the OpenBuildings Energy SimulatorProject Tree, right click on the roof object. The roof object's pop up menu appears. Select Setup roof to floors from the menu.
The Set up roofs for building [your building name] dialog box opens.
- Select the roof design from the drop-down list in the Roof column for the floor you want the roof to be associated with.
-
Click OK.
A pop up dialog box prompts you to confirm your association. Click Yes to continue. The project is automatically saved.
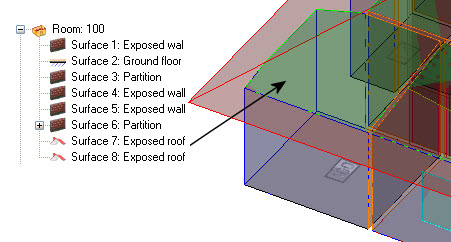
Note: During the save process, the Message Center (to the right of the prompts area on lower portion of the OpenBuildings Station Designer application window) displays room information indicating they are being updated. When the roof is setup, each room in contact with the roof has a separate surface object; Exposed roof added to its hierarchy.